Capture screenshots of selected desktop region with Mirillis Action!
Introduction
With Mirillis Action! you can easily capture screenshots of selected Windows desktop region. Just press a button and screenshots of your selected desktop region will be saved directly to JPG, BMP or PNG format.
Select Active desktop region mode
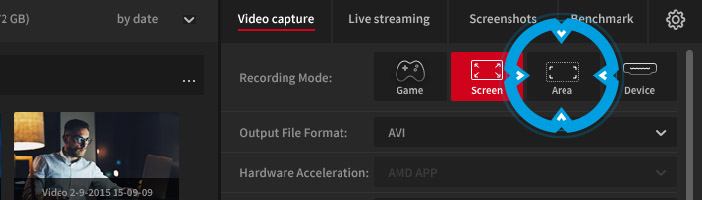
To capture screenshots of selected Windows desktop region please select "Active desktop region/area" recording mode.
Adjust region size and position
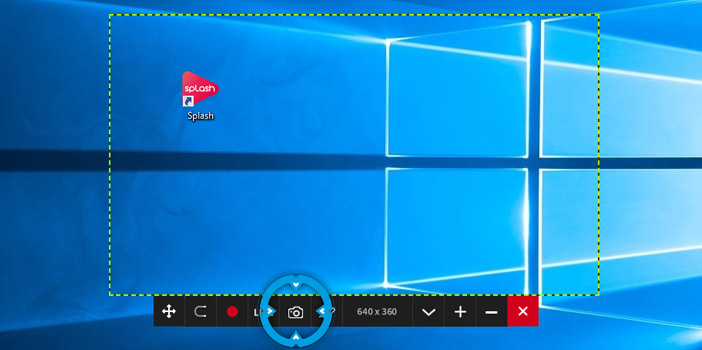
Use mouse to adjust your region size and position. You can precisely control region size and position with keyboard: use arrows to move region, use SHIFT + arrows to resize region. Green region frame indicates that region is accepted and Action! is ready to capture screenshots. Gray frame indicates that current region is not accepted and you cannot capture screenshots.
Capture screenshot
Press capture screenshot icon or press F12 (default hotkey) on keyboard to capture a desktop region screenshot. The desktop region screenshot will be saved directly to selected format (JPG,BMP or PNG).

Screenshots and settings
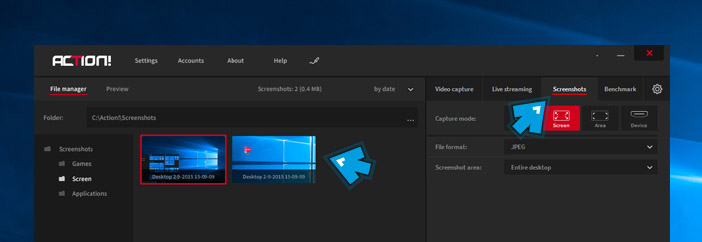
Close "Active desktop region/area" recording mode to show main Action! window. Select "Screenshots" tab to check the list of your screenshots, double click on the screenshot thumbnail to open screenshot preview.
Settings: File format
Allows to select one of available output file formats: BMP, PNG, JPG.
Settings: Screenshot area
For multi-display setups it is possible to select to capture a screenshot from all desktops or from a single desktop only.
This option works only for Active desktop recording mode selected in Video Capture/Recording tab.