Recording VULCAN games and applications with Mirillis Action!
Introduction to Vulcan games recording
Welcome to Vulcan games recording tutorial.
While we are still working on adding native Vulcan recording support for Action! you can use a simple trick to record any Vulcan game or application available. The only requirement is possibility to run Vulcan game or application in windowed mode. Thanks to Action! superb Windows desktop recording performance you can use Active desktop region recording mode to record any Vulcan game in smooth 60fps quality.
Follow this tutorial to learn step by step how to record Vulcan games using Active dekstop region recording mode.
Selecting Vulcan game window region with Action!
To record your Vulcan game please run Action! and switch Action! to "Active desktop region/area" recording mode, then run your Vulcan game in windowed mode.
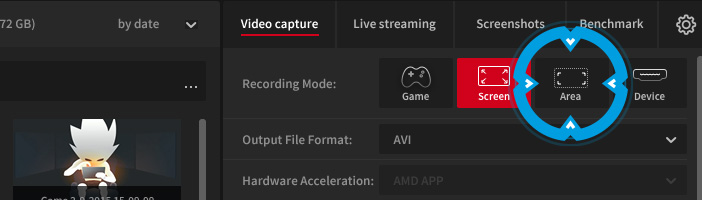
Now, adjust Action! recording region to match your Vulcan game video area. You can do it manually using mouse and keyboard but also you can use "Snap to window" option to automatically adjust region to Vulcan game video area.
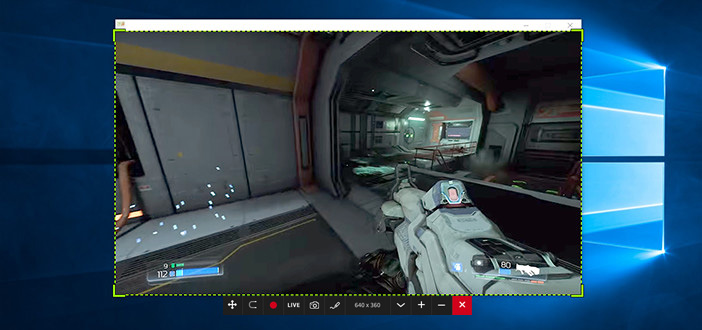
Vulcan game recording
To start your Vulcan game recording use Start/stop recording button or F9 hotkey. Action! region frame and HUD color change showing that your Vulcan game recording is in progress.
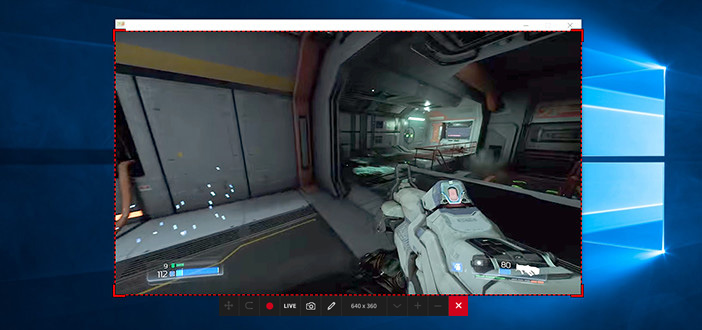
Press Start/stop recording button or F9 hotkey again to stop recording your Vulcan game. Region frame turns green again and HUD status changes showing that your Vulcan recording has finished.