Recording microphone to separate audio file for game and screen recordings
Introduction
With Action! you can easily record your microphone into separate audio file while recording game or your PC screen. This can be very useful if you would like to edit your commentary in 3rd party audio editing software.
Tutorial for Action! 3.x versions:
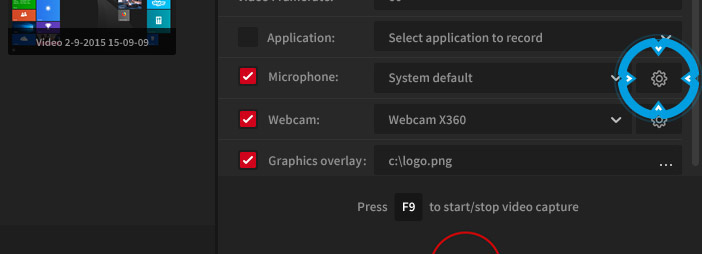
In Action! 3.x version please open Video capture tab, setup your microphone and click Microphone settings button

In Microphone Settings popup window find Audio track option and select Record into separate audio file option.

Tutorial for Action! 2.x versions:
This tutorial part is dedicated for Action! 2.x version users only.
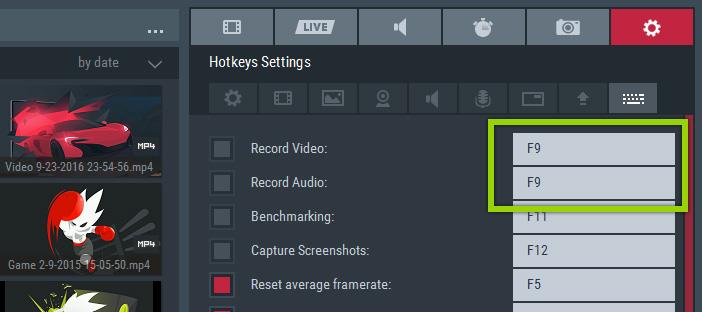
Open Action! Hotkeys Settings and set Record Audio hotkey to the same as Record Video

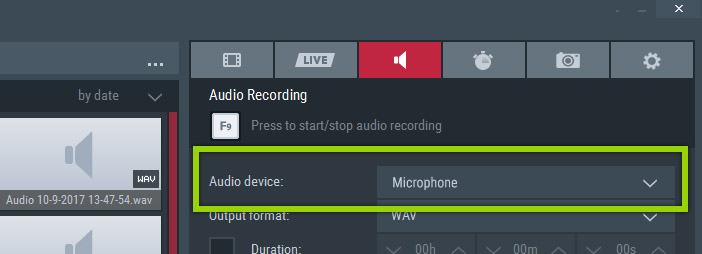
Open Action! Audio Recording tab
Open Action! Audio Recording tab and select your microphone from Audio device dropdown.

If you would like to record any other device to separate audio file, please select appropriate device fromt the list.
Check Video recording tab settings
Open Video Recording tab settings and make sure that Microphone recording is disabled, so it will not be added to your main video recording audio track.

Start Video recording
Press a hotkey to start Video and Audio recording.

Press a hotkey again to stop both Video and Audio recordings. Check recordings manager in Video Recording tab and Audio Recording tab for your new recordings.
Please note that by using red start/stop recording button you can stop Audio or Video recording separately.
