An ultra-secure tool for system administrators developed by Mirillis is finally ready! Need to manage multiple PCs in your organization and access them anytime, even after a reboot? Check out Remotly Quick Host now! To test Remotly Quick Host for free, contact us via the contact form at https://remotly.com/contact.
Key features of Remotly QuickHost:
– Remotly QuickHost does not require you to log in to your Remotly account.
– Remotly QuickHost uses connection IDs to allow connection to PCs running QuickHost instance (RemotlyQH_
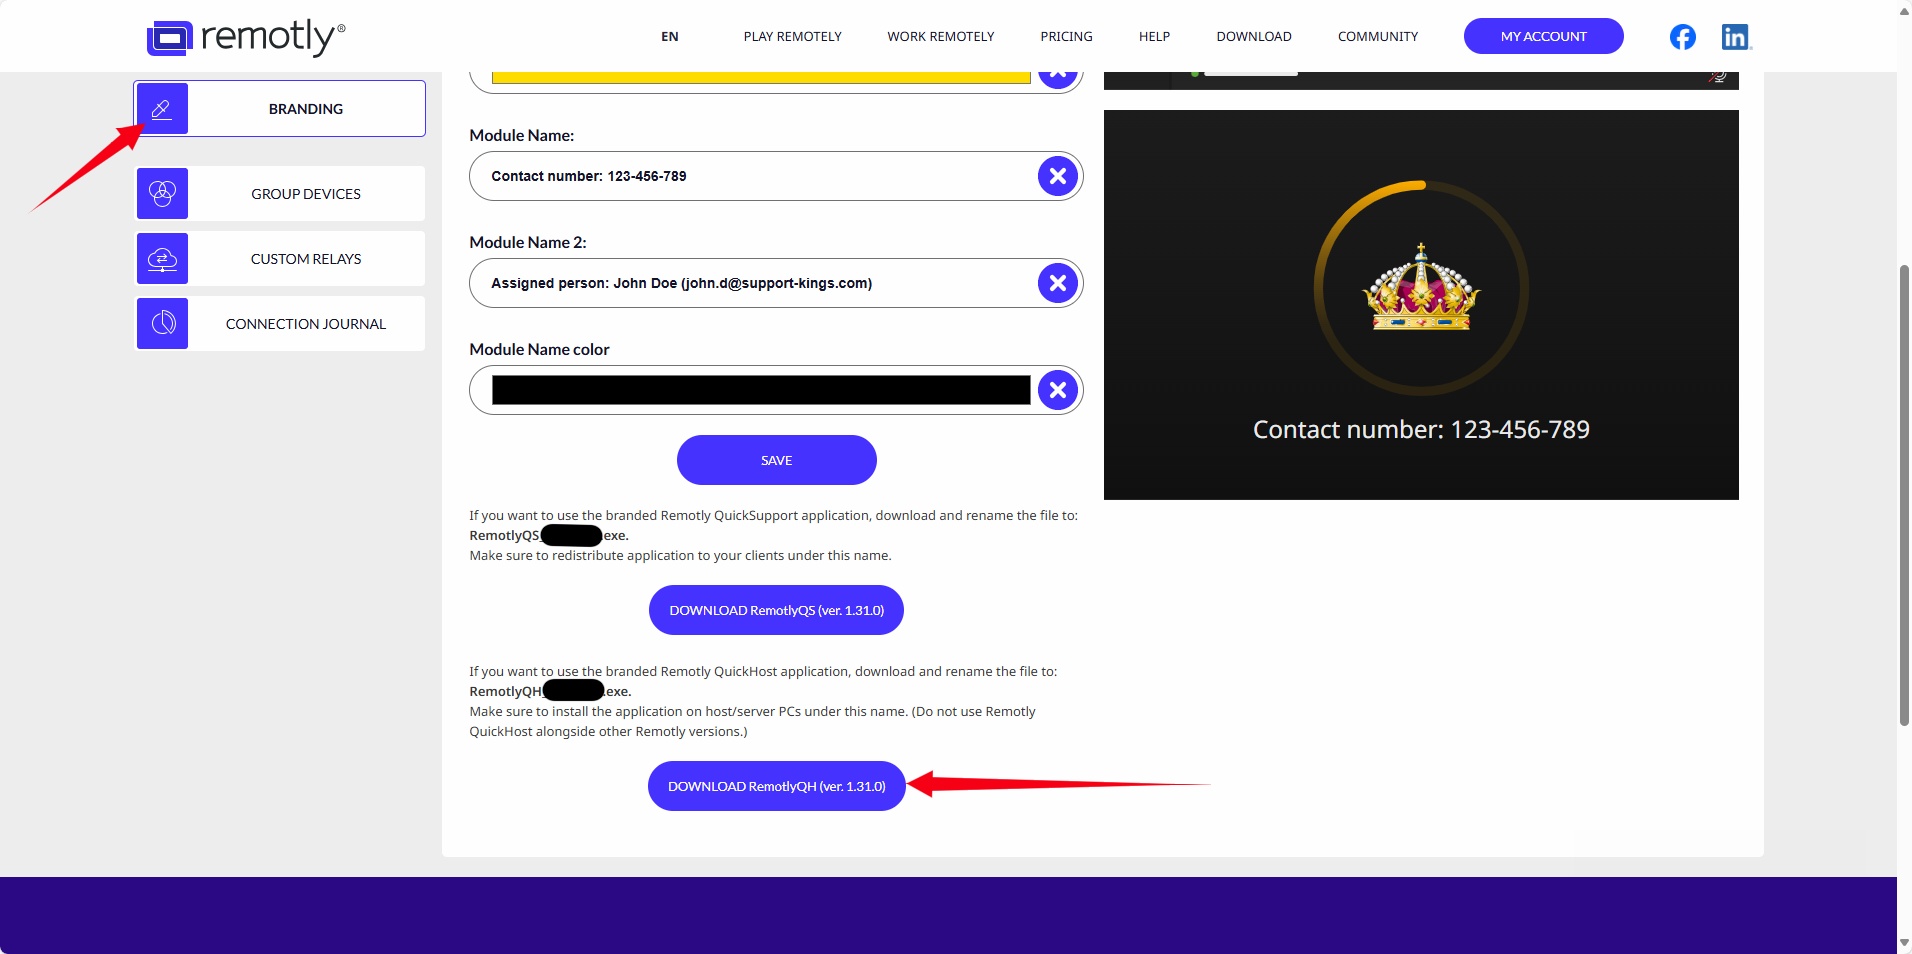
– Remotly QuickHost instance can be branded with company logo, colors and name
– Connections to PCs running QuickHost are allowed only for users in the same organization (licensed users created in the admin panel) – connections from outside the organizations are blocked
– You can easily edit the names of your devices, group them and allow/remove access to them for selected users using your admin panel (hide/show the “eye” icon next to the licensed user).
Please find below a step-by-step guide on how to start using Remotly QuickHost in your organization:
1. Contact the Remotly team to get a commercial trial license (https://remotly.com/contact).
2. Download your branded QuickHost from your commercial admin panel:
3. Install RemotlyQH_
4. Start RemotlyQH:

5. Check the Connection ID associated with the machine running Remotly QuickHost and add a new device in the admin panel using this Connection ID code and create an alias name for it. You can create groups of devices in your admin panel. Please note that the Remotly QuickHost connection ID is different from the connection ID of the regular Remotly version running on the same PC on another user Windows account.
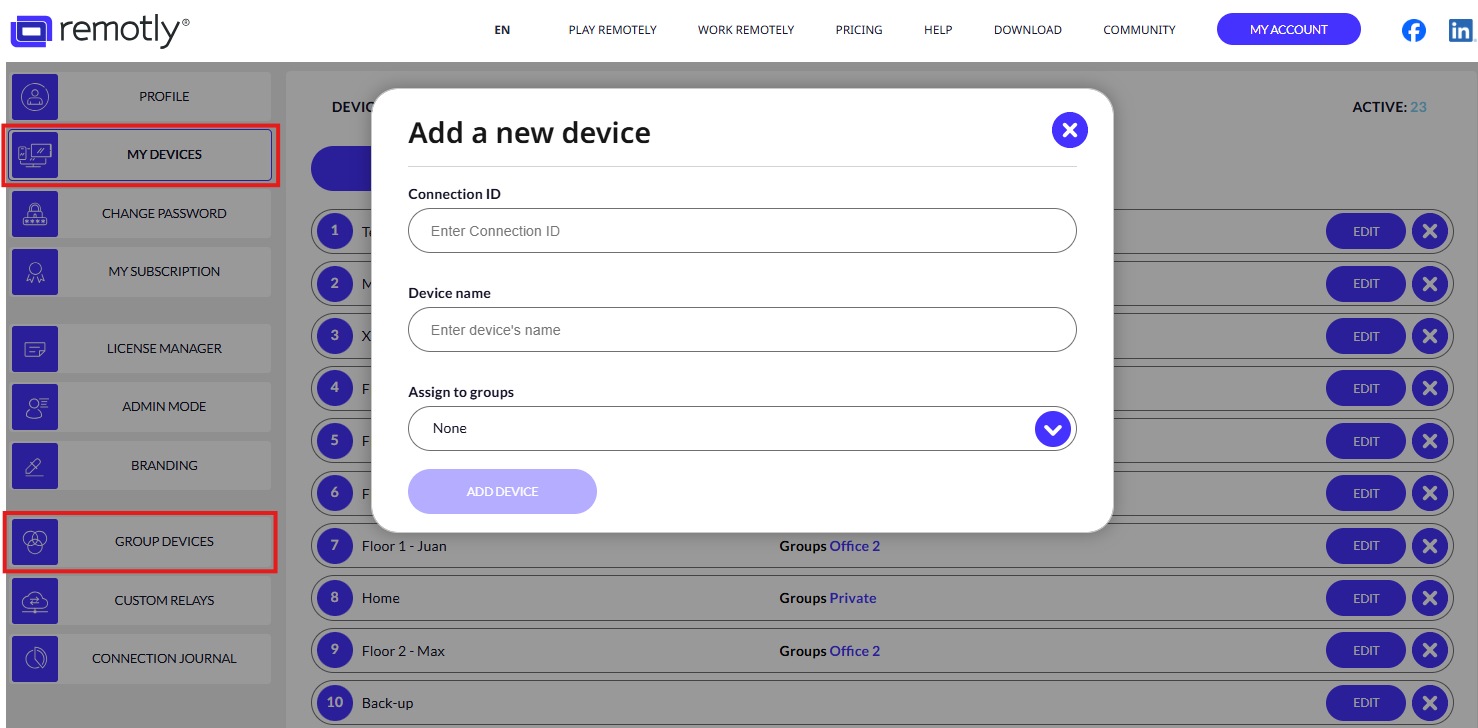
Manage admin rights in your user panel and let your selected users see access to your company devices in the “Admin Mode” tab using the hide/show eye icon.

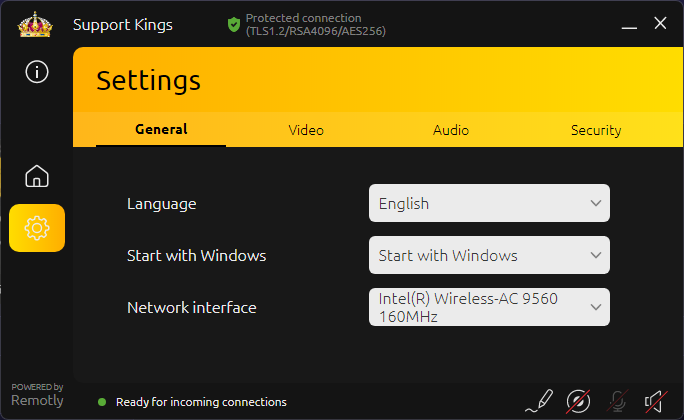
6. Make sure to enable “Start with Windows” or “Start with Windows (minimized)” to allow Remotly QuickHost to work on any user account available in the system or after reboot.
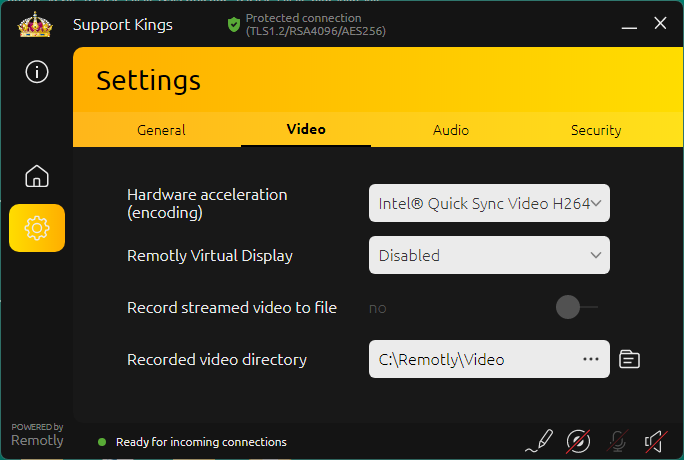
7. You can select the hardware acceleration used for video encoding and allow recording of every remote session:
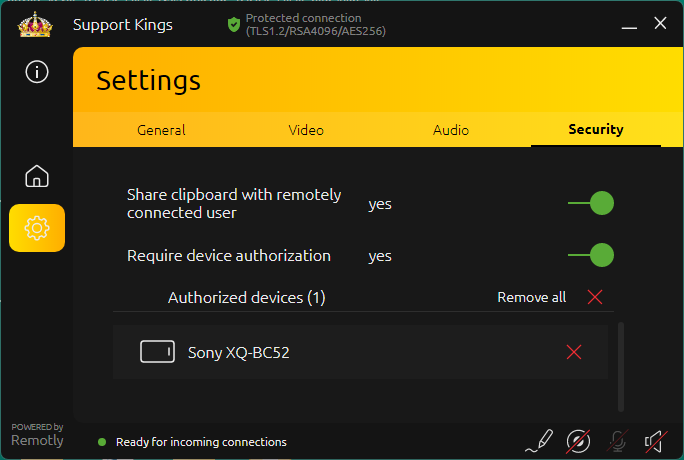
8. Make sure to connect and authorize your master device (like your phone or another PC/laptop). In the example below the Sony Xperia XQ-BC52 is authorized for incoming connections. You can also enable/disable clipboard sharing.
9. Use the authorized device to allow remote authorization of other users you will grant access in your admin panel (licensed users).
10. You can install regular Remotly version on other/normal user Windows accounts (please note the QuickHost should be installed under the Admin Windows user account).
11. After closing Remotly QuickHost UI Remotly Booter will start and you can still remotely access this PC (this is different compared to normal Remotly version).
12. Connecting to a PC in booter/service mode will not show any frame or give any information that you have just connected using the admin/service account.
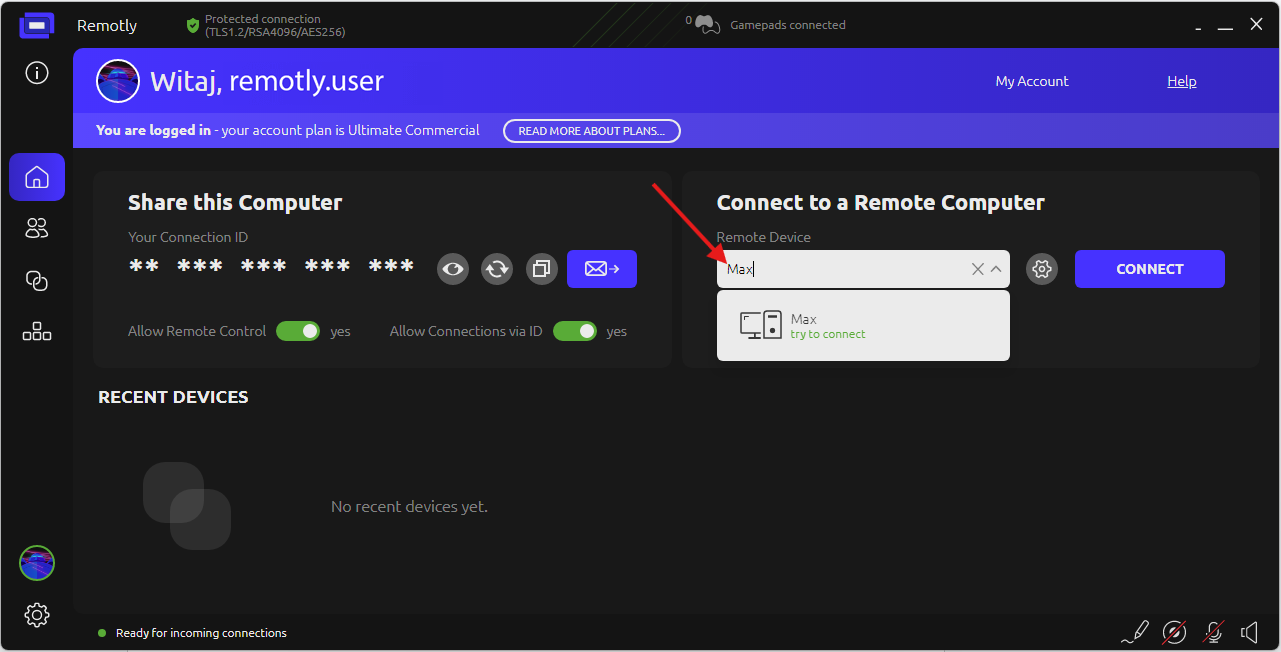
13. To easily select the device you want to connect to in your organization, use the filter option in the Remotly main interface, or find the device in the grouped devices in the Devices tab, also in the Remotly main interface:

Got a question? Ask our support team on the Remotly community forum: https://community.remotly.com/threads/remotly-quickhost-ultra-secure-remote-desktop-solution-for-system-administrators.205/.
Want to test a commercial license? Contact our sales team: https://remotly.com/contact.
Author: Mirillis Team